
How to Create an Apple Tree Garden Arch
This article contains affiliate links. As an Amazon Associate, I earn from qualifying purchases.
An apple tree garden arch is a cottage garden feature made from two apple trees gently trained to grow together. Use this guide to create your own—it covers which tree types to use, the supports you need, and how to train the trees. They need several years to grow and mature, but the final effect is stunning!
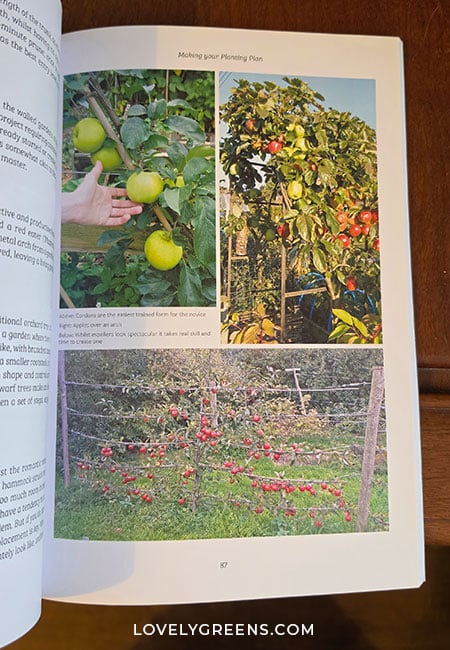
Several years ago, I reviewed a then-new book called The Orchard Book. It’s an inspirational gardening guide by permaculture gardener Wade Muggleton on growing fruit trees in any size garden. It has a lot of fascinating ideas, but my favorite was a small photo and description of an apple-tree garden arch.
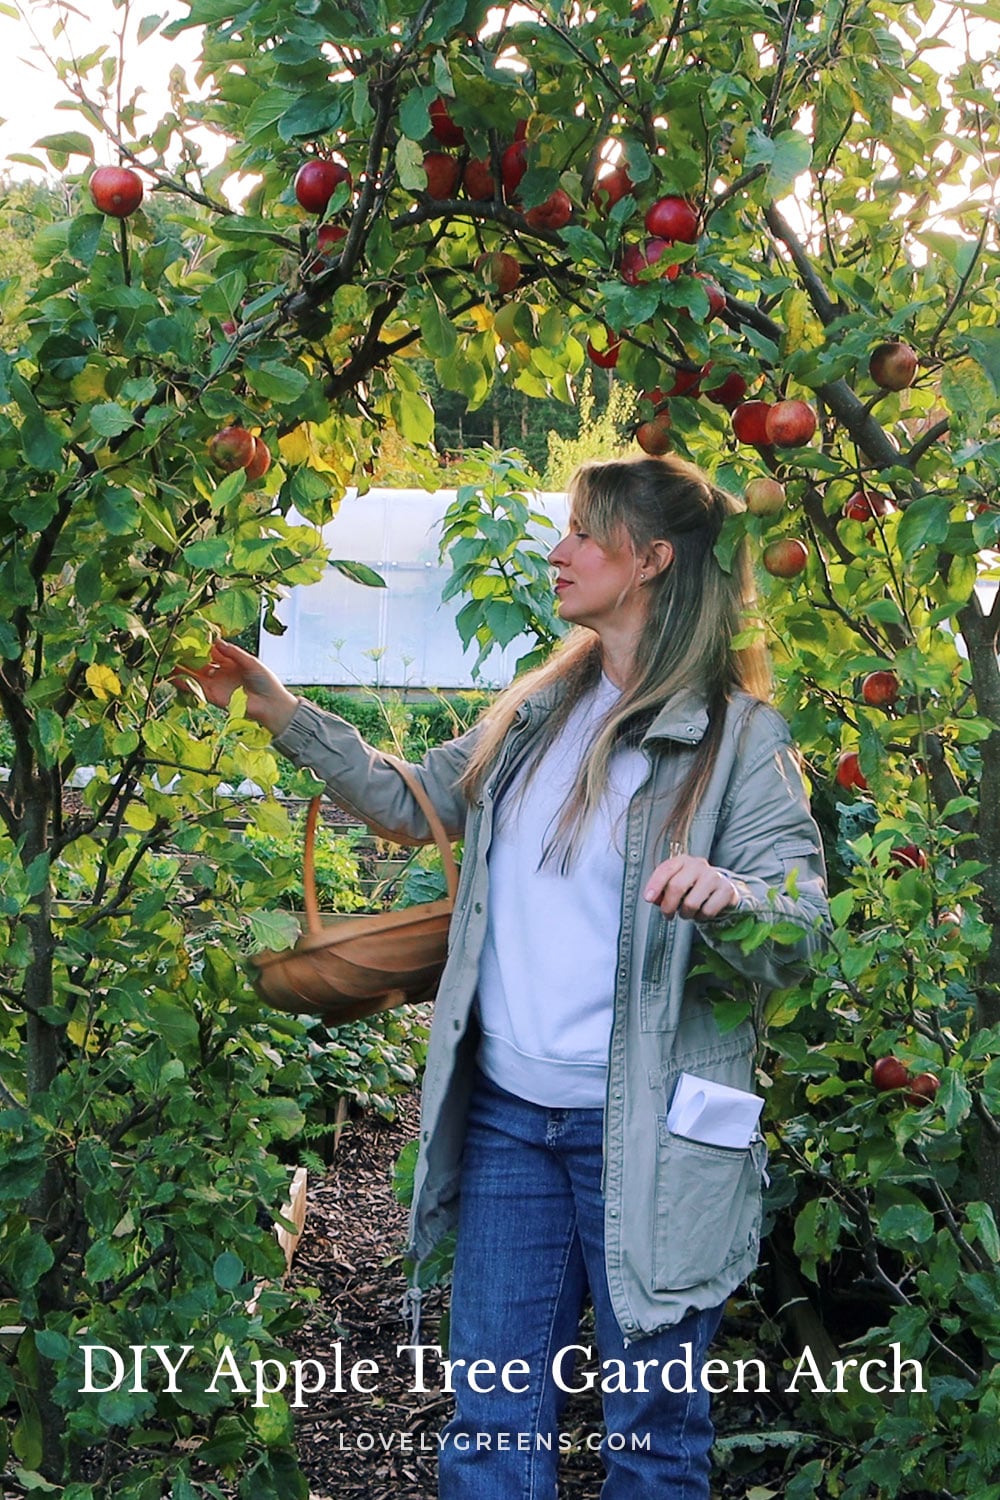
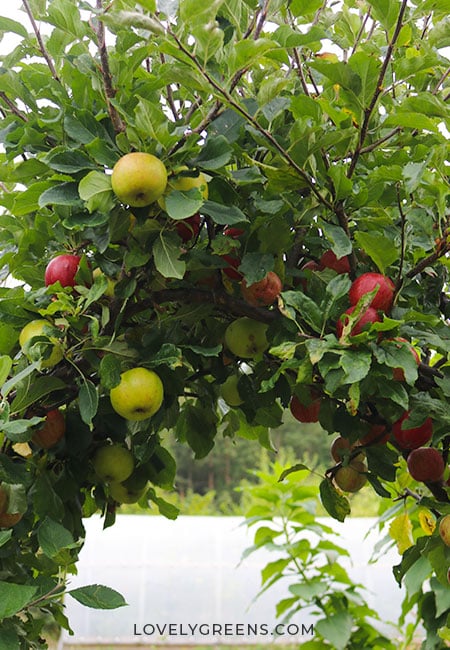
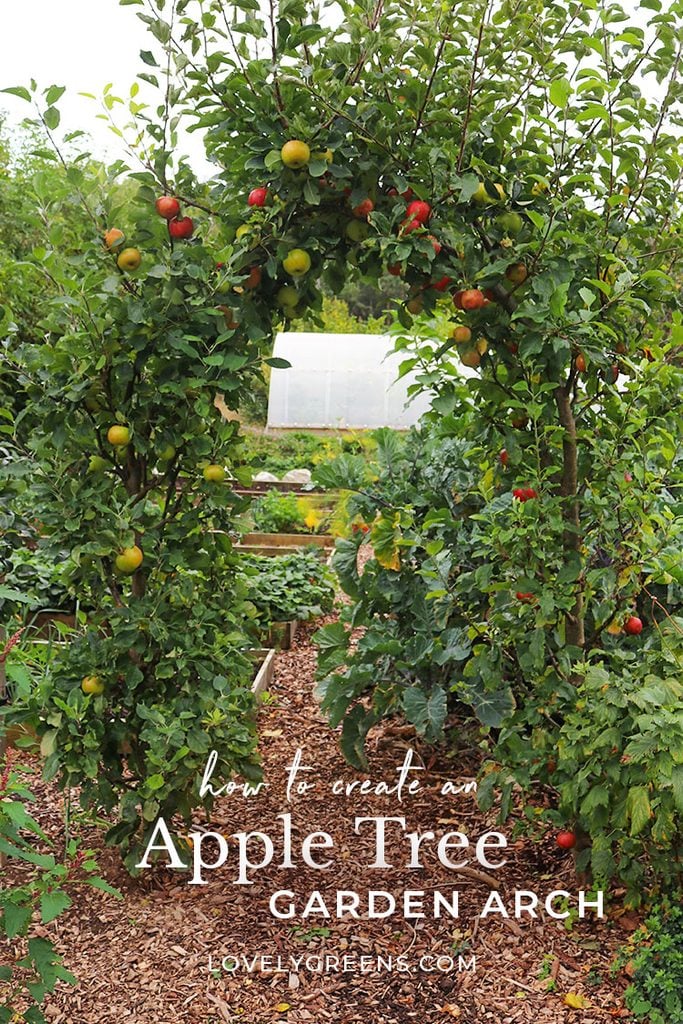
It was a beautiful cottage garden idea, and I was determined to create my own! Using his book and column-trained fruit trees, I went on to create two beautiful apple archways in my own garden. I planted and started training the trees in January 2022, and by the third year they were in their final arch shape. Now, after their fifth summer, they are not only charming garden features but have produced an impressive amount of apples for their small footprint.
Project Overview
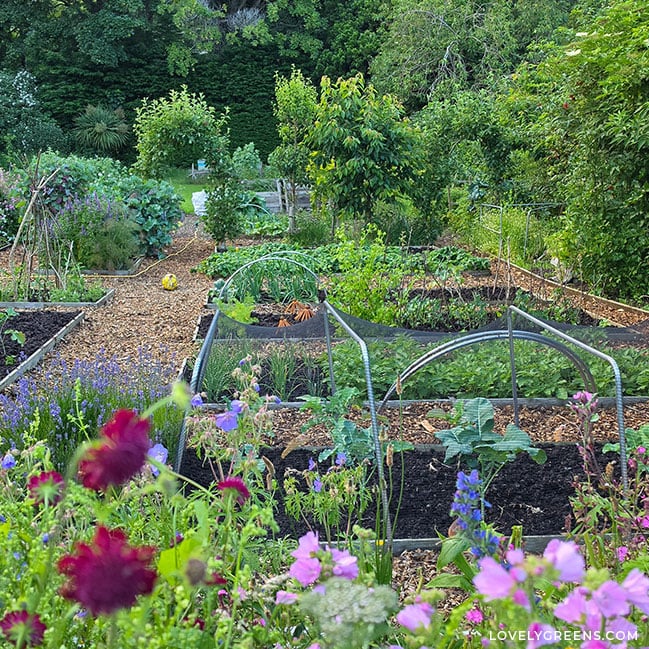
You can plant an apple tree garden arch around a doorway, a gate, or anywhere you can squeeze it in. In my half-acre garden, my two grow over the main paths that lead from the upper garden to the lower. They break up the space, along with a row of other column-trained fruit trees. If you’d like to start creating one, too, here’s what you’ll need:
- Two apple trees
- One garden arch
- Soft garden twine
- Mycorrhizal fungi (recommended)
- Two planting holes
- Two wooden stakes
- Spiral tree guards
- Suitable soil and a sunny position
- Annual pruning and mulching
Growing an Apple Tree Garden Arch
Creating a fruiting garden arch involves planting young fruit trees, such as apple trees, and training them to grow around an existing garden arch. When young, wood is more flexible, and you can train it to grow in all manner of shapes. Over the years, the wood matures and permanently grows in the shape you’ve trained it. Then all you need to do is keep it supported (if necessary), fed, and pruned.
It’s easy enough for experienced gardeners, but a few things are worth keeping in mind. First, this project takes time. You don’t have to do much during the years the trees need to grow, but you do need to be patient. Second, if you choose the wrong type of fruit tree, this garden project might not work well. Some trees grow too large or need a pollination partner to bear fruit.
Lastly, apple trees and other fruit trees grown as a garden arch are more vulnerable to wind, weight, and other forces. To keep your arch in the best health, you need to protect it. More on all of these points as I guide you through the process of making an apple tree garden arch below.
Fruit Trees With Semi-Dwarfing Rootstock
The apple tree garden arch in Wade Muggleton’s book is created with two apple trees—one a green cooker called ‘Catshead’ and the other a red eating apple called ‘Madresfield Court.’ He doesn’t say they are on semi-dwarf rootstock, but I’m guessing from the photo that they are. The trunks are no more than 2-3″ (5-7.5 cm) in diameter, and they would be about 8-10′ (2.4-3 m) tall if they grew vertically.
Apple trees and other fruit trees are often sold grafted onto rootstock that will stop the tree from growing too large. Trees on vigorous rootstocks can grow absolutely huge and aren’t suitable for any but the largest gardens or fields.
For example, you could buy a Gala apple tree on MM111 rootstock that could grow 12-15 feet (3.7-4.6 m) tall or more, or a Gala apple tree on M27 rootstock that shouldn’t get taller than 4 to 6 feet (1.2-1.8 m). The rootstock a tree is grafted on determines how vigorous (tall and wide) the fruit tree will be.
For a fruiting garden arch, you will need two trees that will grow about 8-11 feet (2.5-3.5 m) tall. That’s enough to grow up the sides vertically, then curve over to grow together and create a canopy. For that reason, choose trees on semi-dwarfing rootstock.
Column-Trained Fruit Trees
Most fruit trees sold on semi-dwarf rootstock won’t grow as a pillar. You plant them, and they grow into an ordinary tree shape, with the rootstock type dictating only how tall and large they will get. These fruit trees will have a bare trunk up to a certain point before the first branches appear. These are the type of tree that Wade and others have used for their apple tree garden arches.
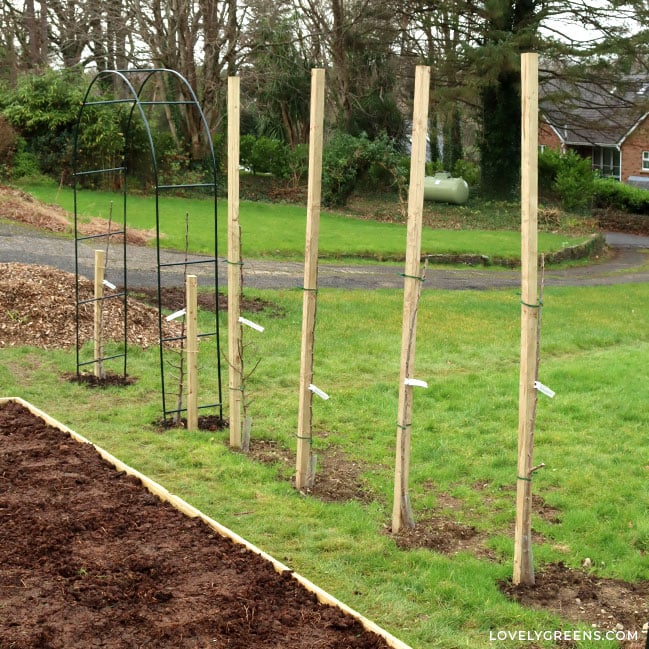
With mine, I used bare-root apple trees on semi-dwarf (M26) rootstock, already trained to grow as a column. You’ll hear me refer to them sometimes as Minarette trees, but don’t be alarmed if you can’t find them for sale. The nursery that offered them, Ken Muir, went out of business, but Minarette fruit trees are a type of trademarked, column-trained fruit tree on dwarf rootstock. They grow as a thin, tall pole with short fruiting branches that reach nearly to the ground.
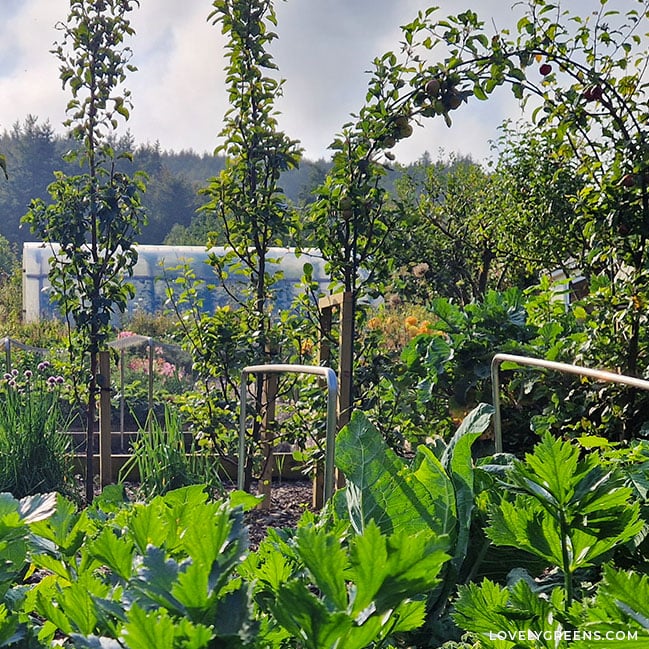
Using four Minarette apple trees, I created two perfectly sized apple tree garden arches. They also produce leafy growth and apples all the way down their trunks, almost to ground level. The trees on one column are Arthur Turner, a cooking apple, and Kidd’s Orange Red, a dessert apple. The other arch is created with two dessert cultivars—Fiesta and Katy. Well, the “Katy” I ordered turned out to be a different type of apple (green apples, not red!), but it’s delicious, too.
Where to Get the Right Apple Trees
Again, Minarette fruit trees are unfortunately no longer available. However, similarly trained trees are sold under the names of column-trained, columnar, supercolumn, or vertical cordon. You can order them from online nurseries or sometimes find them at in-person garden centers and nurseries. Either way, ensure that you have healthy trees with good resistance to pests and disease in your region.
In the USA, this is where you can get a red column-apple tree and a green column-apple tree. In the UK, you can get columnar apples from Chris Bowers & Sons or Pomona Fruits. I found a few other places online, too, so make sure to shop around.
Although I’ve only grown fruiting garden arches using apple trees, I’m certain you could do it with other young fruit and nut trees. Depending on the region, you can find other trees on semi-dwarfing rootstock, including peach, apricot, nectarine, almond, quince, lemon, and orange. Semi-dwarfing rootstocks include M26 (apple trees), Quince C (pear trees), Pixy or VVA-1 (Krymsk 1) for plums and gages, and Gisela 5 (cherry).
Container-grown or Bare-root Trees
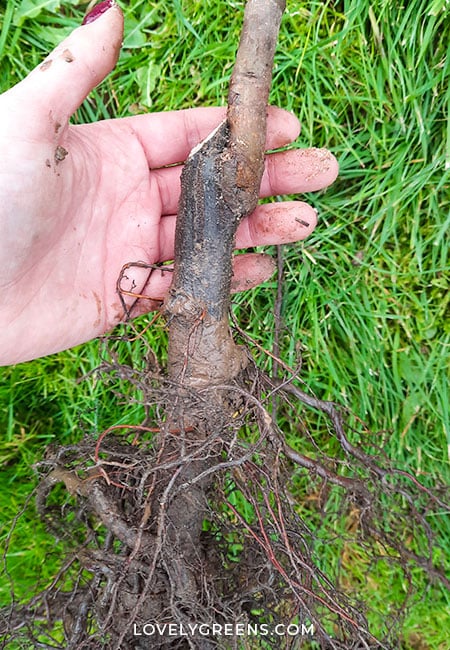
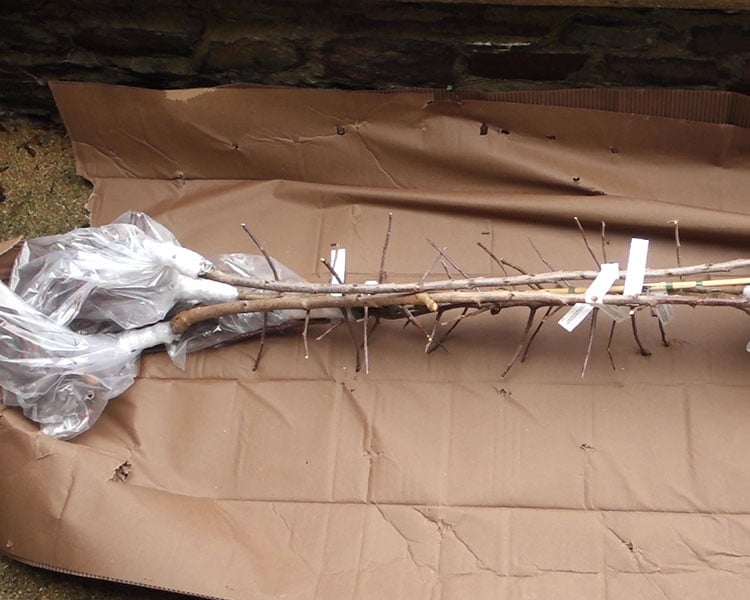
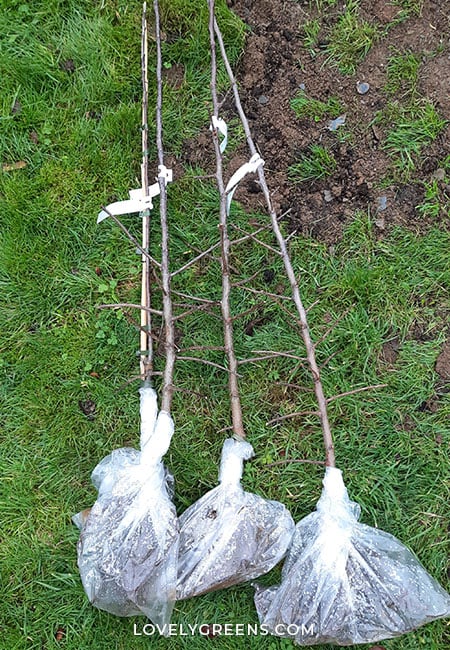
You can get apple trees planted in pots or as young, bare-root trees. I chose bare-root to save money and because that’s what the nursery offered at the time. Bare-root trees are usually sent to you through the mail during their dormant period, and they don’t have leaves or soil around their roots. They’re bagged up to keep them from drying out, and you need to plant them as soon as they arrive. If the soil in your garden is too frozen, wet, or waterlogged, you can heel them in until you’re ready to create the arch.
You can plant potted apple trees at any time in the growing season. You can even plant them in the ground in late winter and early autumn, as long as the ground isn’t frozen. Another bonus is that tree nurseries and garden centers can have them in stock, so you can shop in person and choose the ones you want.
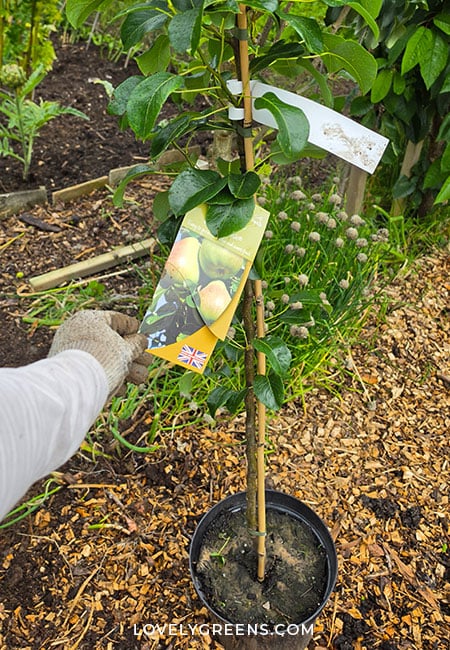
For those reasons, potted trees give you more flexibility in when you start creating an apple tree garden arch. There are downsides, though. Potted trees are usually more expensive, especially when you factor in shipping costs. You might also have fewer choices if you’re relying on in-person shopping.
Wooden and Metal Garden Arches
For every apple tree garden arch you make, you will need two trees. You will also need an existing garden arch to train them against. The garden arch could be a permanent feature, such as the wooden one I grow roses on, or an inexpensive metal one. They don’t last as long, but that’s acceptable for this project.
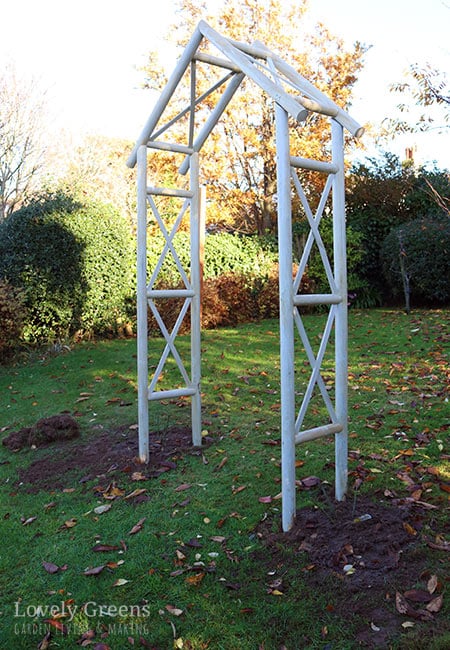
I opted for the cheap metal ones to create my arches. I wanted a rounded spire on my arches, and I also wanted to remove the metal framework once the trees became self-supporting. It was a gamble in my garden since we can have some pretty fierce storms. If I create any more, I may choose a heavier-duty wooden archway, though. Left in permanently, they would give me better peace of mind that the trees won’t break. Wind and heavy apple loads can both cause damage.
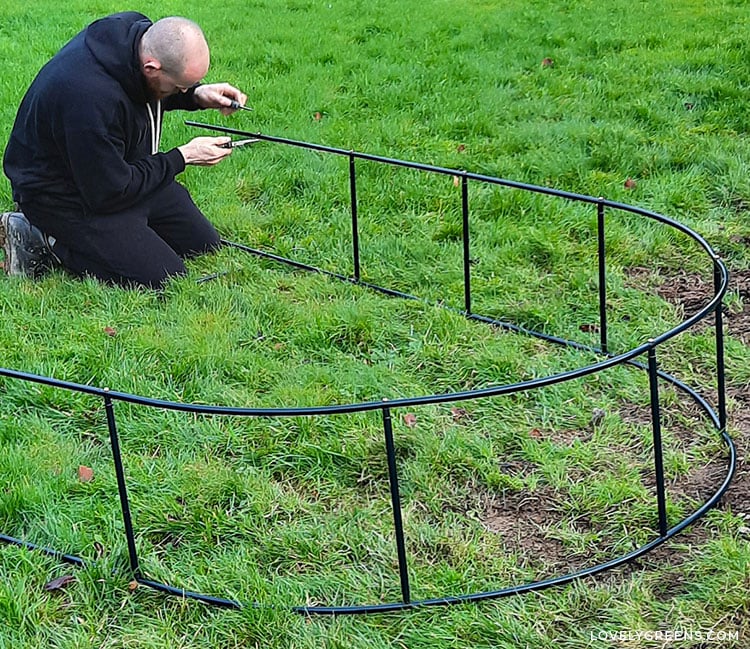
Despite this, my apple tree garden arches are fairly sturdy. I removed the wooden supports and metal framework from them after three years, and both are now self-supporting. I couldn’t have left them anyway, since the metal eventually corroded and the arches started to break down.
Preparing to Make an Apple Tree Garden Arch
Begin by choosing a good site for an apple tree garden arch. It should have good, fertile soil and get at least 8 hours of sunlight per day in the spring and summer. If the spot you choose doesn’t get that much, the trees may not grow as well or produce many apples.
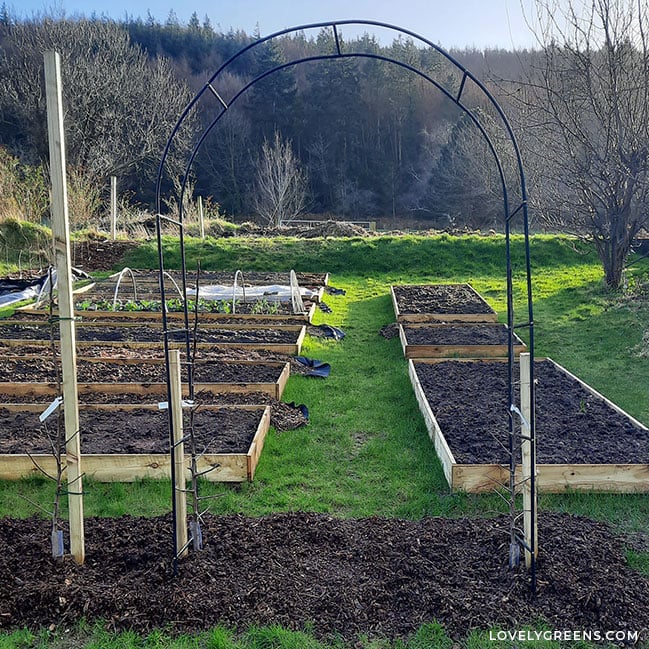
Then, gather your materials. You’ll need two apple trees (types discussed above), a garden arch, soft garden twine, and a garden fork or spade (or shovel). If you’re using a cheap metal garden arch as I did, I recommend you also use two 4′ (1.2 m) stakes to help support it. For healthier growth, also consider using mycorrhizal fungi and spiral tree guards. Spiral guards wrap around trunks with lots of branches and help stop rabbits, deer, and rodents from nibbling the bark in winter.
Build and install a metal or wood garden arch first. Dig it into the ground at least 18″ (45 cm) deep since it will not only need to support itself but the trees that will be growing against it. Dig the holes for either side of the arch wide enough to also make space for the trees’ roots and the wooden stakes.
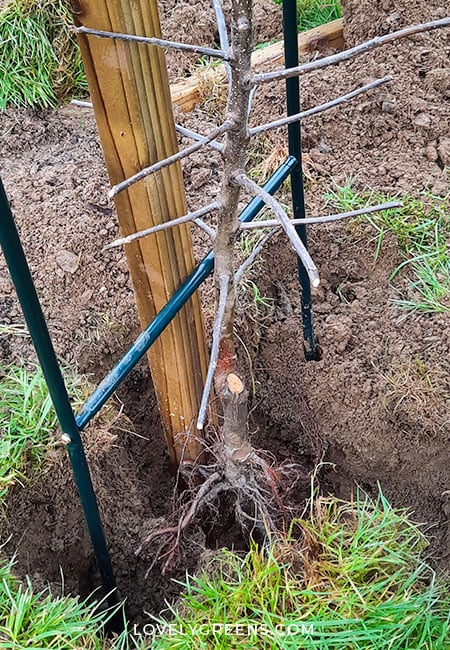
If you’re using a cheap metal arch, dig in the wooden stakes so they are on either side of the arch. They should be in deep enough to be sturdy and touching the metal arch.
Planting the Trees
Now for the planting. The best time to do it will depend on whether you use bare-root or potted trees. With bare-root, you plant them as soon as they arrive, in winter. Begin by soaking their roots in a bucket of water for about half an hour just before you plant them. This gives them time to rehydrate and plump themselves with moisture before going in the ground.
If you’re opting for potted trees, you don’t need to do anything with them before planting, and you can plant them from early spring to autumn.
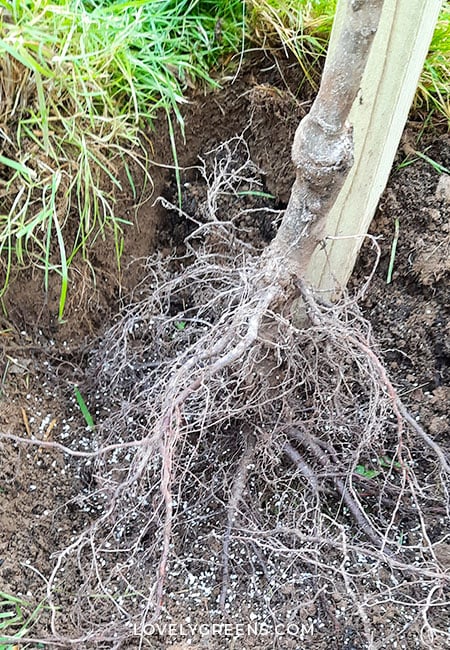
You may be tempted to add compost or fertilizer to the holes—I don’t recommend it. Rich material in the planting hole encourages tree roots to stay in that area rather than grow outward.
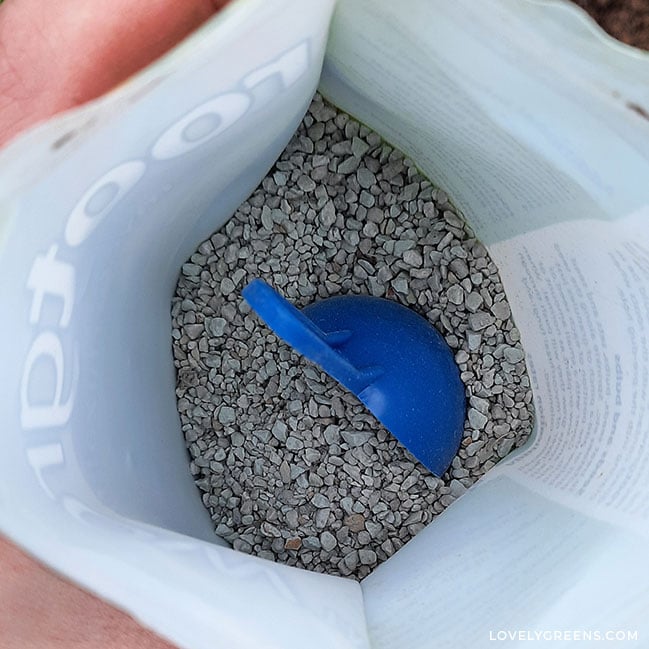
Plant a tree on the inside of either side of the garden arch. The young trunks should be very close to it, even touching. With bare-root trees, make sure the graft union is well above soil level. If it’s buried, the upper part of the tree might grow roots, and your tree might not stay small! For quicker growth, sprinkle mycorrhizal fungi over the roots.
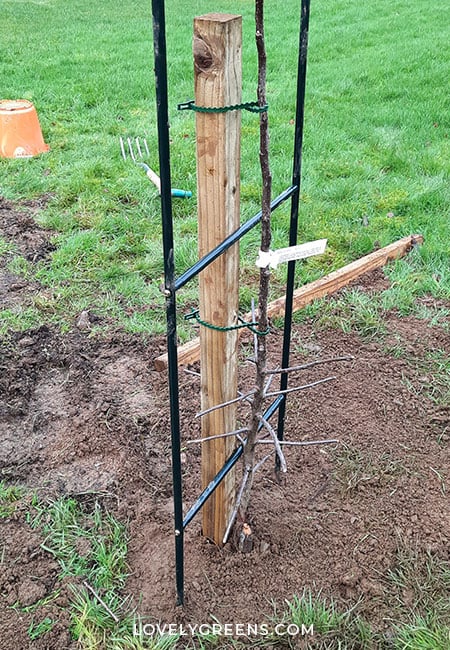
With potted trees, check that the root flare isn’t buried under the potting mix before planting. If not, then plant them so that the soil level in the pot is flush with your native soil.
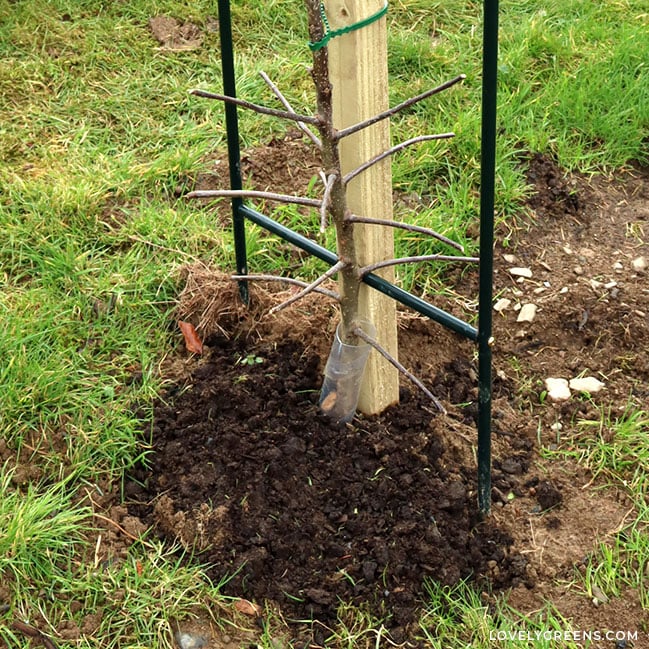
Fill the holes with your native soil, gently firm it down, and water them in well. Next, attach the spiral tree guards and spread up to an inch (2.5 cm) of garden compost or aged manure on the bare soil around the tree. Don’t pile it up on the tree itself, though, since that can cause rot.
Train Apple Trees to Grow into an Arch
Training the trees to grow into an arch begins immediately after planting. I recommend using soft garden twine to secure the young trees to the garden arch and/or stakes. I started with hard plastic ties, but they rubbed too much on the trees and became brittle over the first year. With string, use a figure-of-8 loop, making sure the tree is secured firmly, but the string isn’t pulling on it. After this, your work is complete for now.
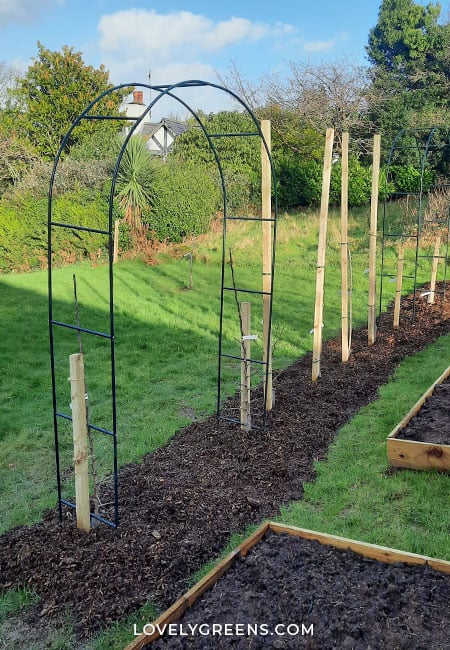
In the first year, the little trees will grow vertically on either side of the arch. Use more soft garden twine to secure them, and remove any small apples that might form. You want the tree to focus on growth, not producing fruit just yet. Also water the trees if it’s hot and the soil is dry.
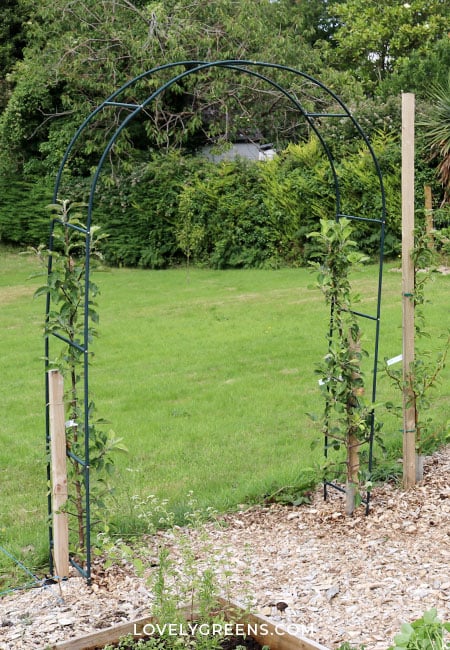
In the first and second year, the trees will become tall enough to start guiding them over the arch. Use more soft garden twine to secure the young pliable wood to the metal or wood structure. As the young bendy wood matures, it becomes less flexible and will permanently take on the shape. In the second year, you can allow a small crop if the trees are growing strongly and have established well.
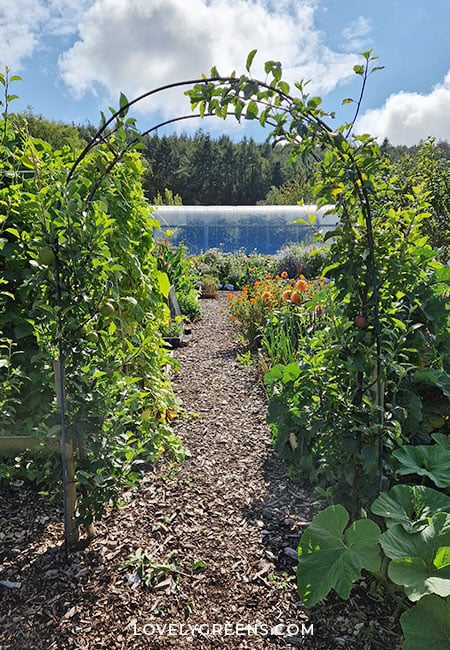
Eventually, the two trees will bend over the arch and begin growing downwards on the other side. The canopies of both trees will become entwined, and strategically secured soft garden twine will help hold them together. Secure them so they support each other, but branches aren’t rubbing against one another.
Pruning an Apple Tree Arch
As the trees grow vertically, they will also produce side shoots. Some will grow vigorously, while others will develop into short, stubby fruiting spurs. These spurs carry the flower buds that will eventually produce apples, so it’s important to recognize and protect them when pruning. Flower buds are generally plumper and rounder than pointed leaf buds.

Using clean, sharp secateurs, summer-prune the trees to control growth and encourage fruiting. For established vertical cordons, you generally do this from mid- to late summer, once the lower third of the new shoots has become woody. The exact timing depends on the weather and growing conditions.
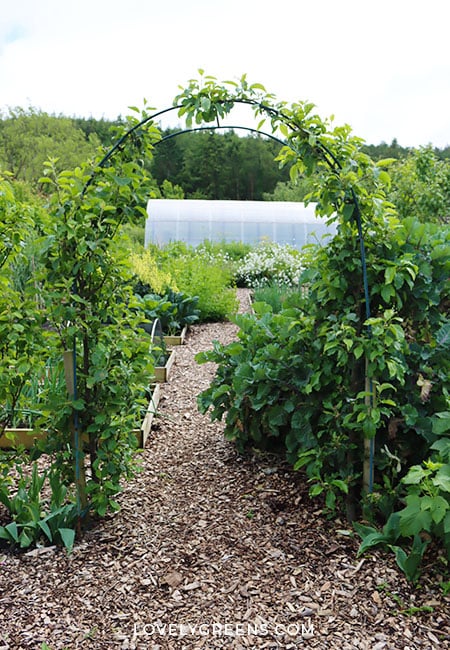
Shorten vigorous new side shoots that are longer than about 8″ (20 cm), making the appropriate cut according to whether they grow directly from the main stem or from an existing side shoot. You should also remove any dead, diseased, or damaged wood, as well as branches that are rubbing against one another.
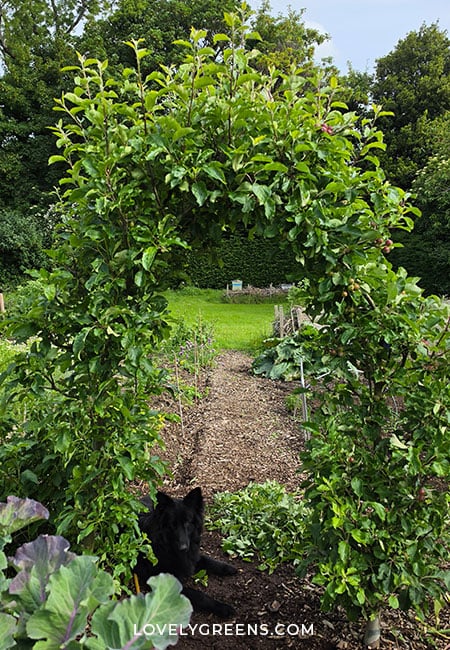
While you’re busy pruning, leave shorter shoots alone, as they may already have fruit buds at their tips. Avoid cutting off established fruiting spurs, and keep the main leader growing while it is still needed to extend the arch.
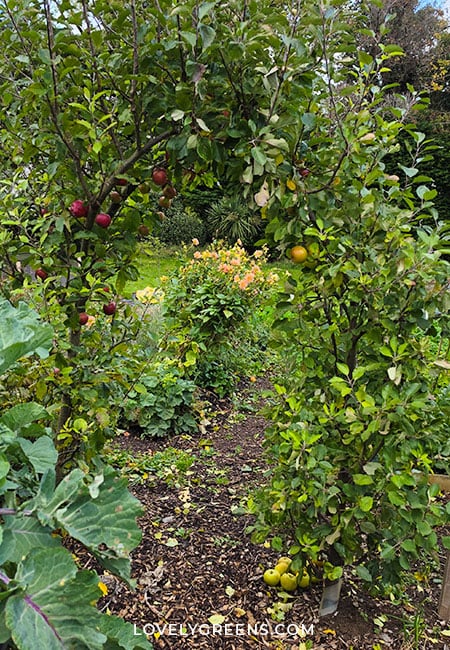
As far as timing goes, summer pruning helps keep the trees compact and lets light and air reach the developing fruit. Pruning in late winter, or taking too much off at a time, can stimulate the trees to produce lots of whippy, bushy growth. I found this out after a winter prune, and it’s not really what you want with this project.
Caring for a Fruiting Arch
Apple tree garden arches, or any fruiting garden arch, are more high-maintenance than ordinary apple trees and need a lot of care. That begins with pruning every summer. Watching how they move in the wind will help you decide whether to add more soft twine supports to tie them together at the top. They’ll also need a top-up of fresh compost as mulch to keep them fertilized.
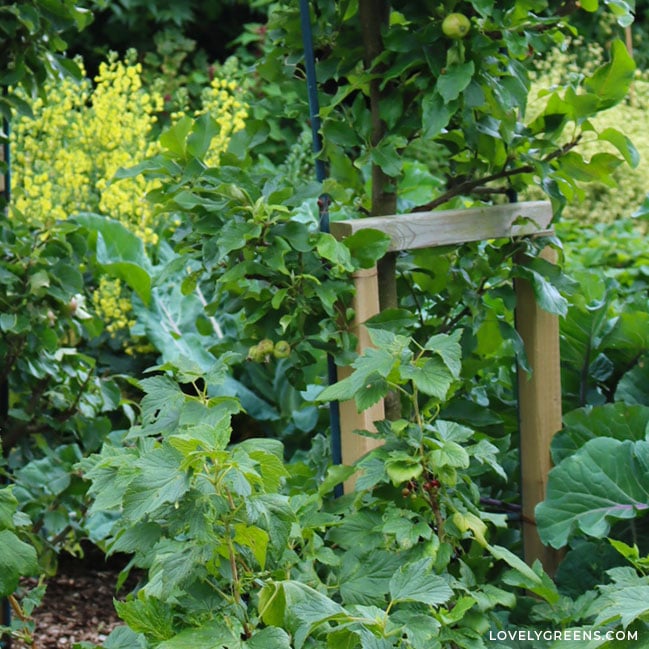
After a few years, my trees were firmly rooted, secured to each other, and well pruned. I felt they were strong enough to be self-supporting, so I decided that was when I’d fully remove the supporting garden arches. By then, they were pretty rusted through and easy to take out. Even so, I use soft string and twine to secure the branches of the two trees together and regularly look for stress and disease.
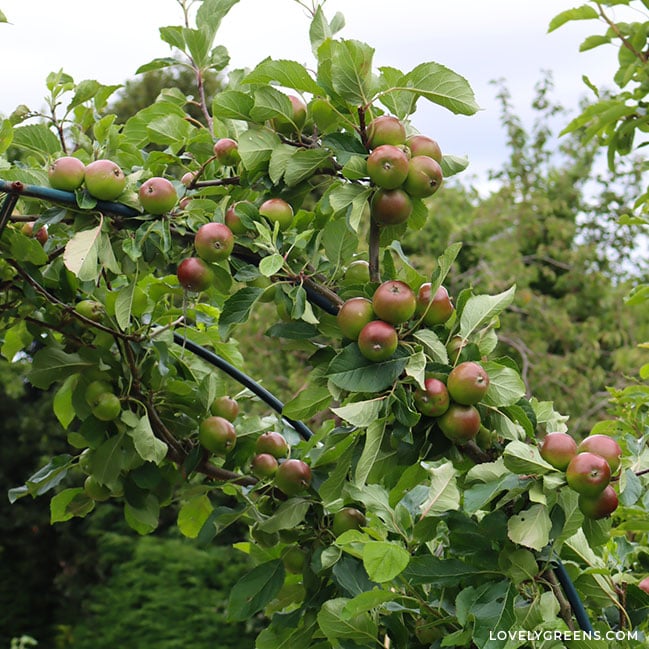
The time it takes for your trees to reach this stage may differ, though. Depending on your trees, location, and local climate, you may even want to leave an arch there permanently. If the apple tree garden arch isn’t strong enough to withstand wind, heavy loads, or other forces, the trees may get damaged or break.
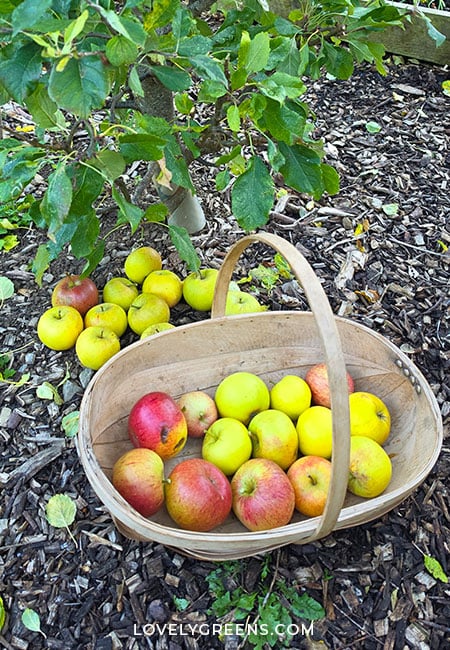
If you feel that they are self-supporting, you can remove the supporting garden arch. This is optional, though. Mine, being cheap metal arches, were easy to unscrew and break apart. They had wooden supports and twine on them by that time since they’d started corroding away the previous year.
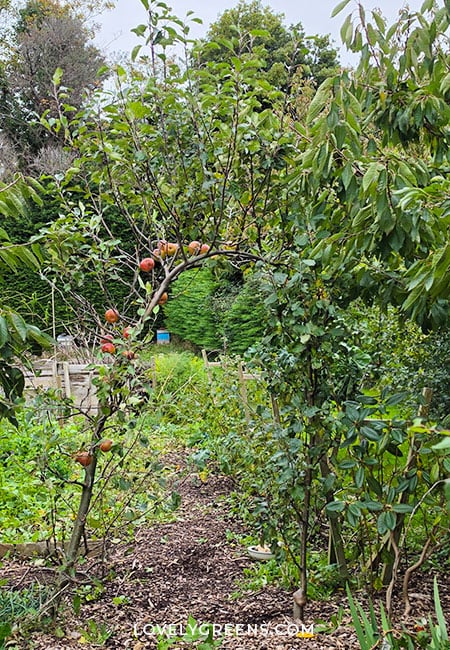
As the living arches grow, maintain their annual summer pruning regime and try to remove all but one apple from each cluster. I’ve left two on, but when they started ripening, I felt stressed about the arch being able to hold the extra weight up. Too many apples hanging from the branches adds weight that could cause damage. Also check that the twine you use isn’t breaking down or digging into any of the wood. Remove and replace it as necessary.
More Fruitful Ideas for Your Garden
I think that’s about it, but if you have any questions about creating an apple tree garden arch, leave me a comment below. Please also watch the DIY video where I show exactly how I planted and created mine. It may answer any further questions you might have.
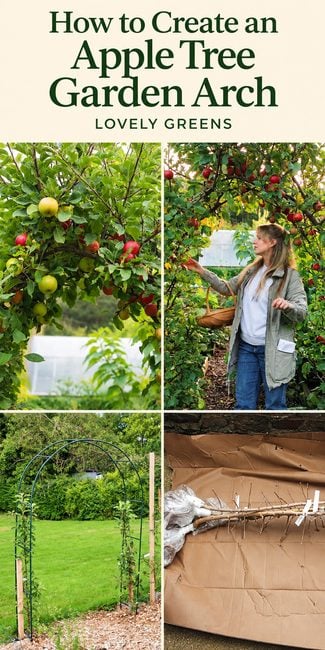
Growing fruiting garden arches is a long-term project, but the result is stunning! You can create one to connect one part of your garden to the next or maximize food-growing space in small gardens. They also look perfect in cottage gardens, and the delicious apple crop they produce is almost a bonus.
- How to Grow Thornless Blackberries
- DIY Raspberry Cane Garden Edging
- The Best DIY Strawberry Pallet Planter
- 70+ Perennial Vegetables to Grow for Years of Harvests
- Red Apple Pie Recipe