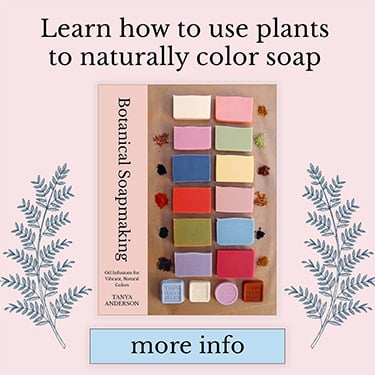
Pink Himalayan Salt Soap Recipe
This website is reader-supported - thank you! As an Amazon Associate I earn from qualifying purchases.
How to make pink Himalayan salt soap with natural clay colorant and fragrant essential oils. Includes information on how much salt you can add to soap recipes and full instructions for making salt bars using the cold process soapmaking method.

Gaining popularity in beauty circles, salt soap combines the cleansing action of regular soap with the exfoliating, detoxing, and clarifying properties of salt itself. You use salt bars just like ordinary soap, especially when your skin feels dull or oily. They’re laden with fine salt that adds scrubby action and cleansing properties particularly helpful for those with acne-prone skin. The recipe below will show you how to make pink Himalayan salt soap using the cold process method. It will explain more about making salt bars and salt bar soap recipes in general.
You’ll find that this recipe is very similar to other cold-process soap recipes. One main difference is pouring a sizable quantity of fine pink Himalayan salt into the soap batter. The finished bars are very hard and have tiny pieces of embedded salt throughout. I also share how to decorate the tops with larger-grained pink salt for a beautiful, crystal-like effect.

Benefits of Salt Soap
We’ve used salt in skin care for thousands of years. As a salt scrub or salt bar, it works as a natural exfoliant, removing oil and dead skin cells. Dissolved in water, either as seawater or bathwater, it can cleanse your skin and disinfect small wounds. Some types of salt, such as sea salt and Himalayan salt, contain trace minerals that our skin can potentially absorb. Altogether, salt can improve the texture and clarity of our skin and improve our overall health. Salt soap exfoliates the skin, cleans broken skin and acne breakouts, and can lead to a finer and clearer skin texture.
However, salt soap isn’t something that you would use every day. Because it is an exfoliant and is great at cleaning out pores, it’s best reserved for once a week or when your skin needs a deep clean. It feels like you’ve just had a spa treatment after you have, though! After your first use, your skin can feel as fresh as it does after a day at the beach. Using it too often could lead to overdrying, though, so keep it as a tool in your regime rather than as a daily product.

Using Salt in Soap Recipes
When you add salt to soap recipes, it adds immediate hardness. That happens both when you add salt crystals or salt dissolved in a solution. Added dissolved, salt can be useful in making soap recipes, such as this Castile soap recipe. It takes a long time to firm up in the mold, but salt helps speed up that process. I go through that in my seawater soap recipe. Himalayan salt also has a mineral content that includes small amounts of magnesium, calcium, and potassium. How much of this gets absorbed through the skin is debatable, but it probably doesn’t hurt to include it in our skincare products.

Himalayan Salt Substitutes
In soap recipes, we mainly use pink Himalayan salt for its pretty color. Remember, though, that pink Himalayan salt is mainly made up of sodium chloride (table salt). Sodium chloride salt is what lends to all of the great qualities of salt bars, so if you’re not able to source pink salt, feel free to use fine-grained sea salt or table salt (without additives) for this recipe. It won’t be pink, but it will have the same exfoliating and skin-cleansing effects as pink Himalayan salt.
Also, Dead Sea salt only contains about thirty percent salt (as we commonly know it), and Epsom salt does not contain salt at all. While you can use them, they’re not direct substitutes for the pink Himalayan salt in this soap recipe.

There’s also flexibility in how much salt to use in salt soap bars. My recipe below includes fifty percent of the main soaping oils as the amount of fine salt to add. To explain, there are 454 grams of main soaping oils (coconut, olive, and castor). Half of that number is 227 g, and that’s how much salt I’ve included. However, you can use up to equal amounts of salt as the main soaping oils. So, for this recipe, you could use up to 454 g of fine sea salt if you wish. The more salt you use, the harder, more exfoliating, and creamier (vs. fluffy) the lather the bars will be. You’ll also get more soap bars from the recipe.

Challenges of Salt Soap Recipes
There are decisions that I’ve made in this soap recipe that takes into account the challenges of making salt bars. First of all, salt impedes soap’s lather. That means that it can decrease the number of bubbles and how fluffy the lather is. Salt can even stop soap bars from lathering, which is why most soap doesn’t work well in seawater.
To compensate for this, I’ve made this recipe seventy percent coconut oil. Coconut oil soap can lather well in both salty water and when we add salt directly to the soap batter. The main challenge of high coconut-oil soap recipes is that they can be over-drying on the skin. For that reason, this recipe also has a high superfat.

The other main challenge in making salt bars is humidity. Salt attracts moisture from the air, so if you live in a humid place, ensure that the soap stays in a room that is humidity controlled. The way I do that is to have a dehumidifier running at all times. Soap also needs to breathe, so it’s a bad idea to wrap salt bars or put them in closed containers. It may lead to beads of moisture appearing on the bars inside the wrapping.
Pink Himalayan Salt Soap Recipe
This Himalayan pink salt soap recipe follows a standard 1 lb (454 g) soap recipe. Ordinarily, this would give you about six standard-sized bars. Because we add fine salt to the recipe, that creates more volume, so we get an extra seventh bar. Salt soap also hardens quickly once you’ve poured it into the soap mold(s). For that reason, I recommend that you use cavity molds such as I show in the instructions.

This is a relatively easy soap recipe. However, one thing I advise before you begin is knowing what an emulsion or light trace looks like. Because this soap recipe is high in coconut oil, it can thicken and set relatively quickly. You should be able to identify the earliest time that you can mix in the fine Himalayan salt. If you get it in at an early stage, then you’re not panicking about pouring soap batter before it gets too thick.
This recipe also uses a low soaping temperature to help slow down trace and has a high superfat. Because soap recipes high in coconut oil can be overdrying, we use a high superfat, or extra oil that doesn’t turn into soap, to compensate. Doing this makes the soap feel more comfortable on our skin. If you’d like to check out some other related soap recipes, there are a few just below.
- Sea Salt Soap Recipe (seawater soap)
- 100% Coconut Oil Soap Recipe
- Pretty Pink Heart Soap Recipe
- Cochineal Soap Recipe (naturally pink)
- Himalayan Rhubarb Soap Recipe (magenta color)

Pink Himalayan Salt Soap Recipe
Equipment
- 6-cavity silicone mold (you'll need two of the molds for a single recipe)
Materials
Lye Solution
- 65 g sodium hydroxide 2.29 oz
- 130 g distilled water 4.65 oz
- 1 tsp French pink clay 4 g / 0.14 oz
Solid Soaping Oils
- 318 g coconut oil (refined) 11.21 oz / 70%
Liquid Soaping Oils
- 100 g olive oil (light colored or pomace) 3.52 oz / 22%
- 36 g castor oil 1.28 oz / 8%
After Emulsion
- 227 g pink Himalayan salt (fine-grained) 8 oz
- 1 tsp patchouli essential oil optional
- 2 tsp ylang ylang essential oil optional
To Decorate
- pink Himalayan salt (coarse) optional
Instructions
Organize Your Workspace
- Cold-process soapmaking is chemistry, and this recipe uses lye. Lye is a caustic substance that is completely neutralized in the soapmaking process, but it can be harmful if not handled correctly. Please read this soap making safety guidance before proceeding.
- Before you make this soap recipe, it's safety first! Make sure to be wearing closed-toe shoes, long sleeves, eye protection (goggles), and rubber/latex gloves.
- Pre-measure the ingredients and ensure that your work surface is organized with all the tools and equipment you'll need. Open a window for ventilation, close doors on pets and children, and have everything you need prepared.


Create the Lye Solution
- In a heat-proof jug, blend the French pink clay with the distilled water so there aren't any lumps. A whisk will help.
- Work in a well ventilated area – near an open window or outside– and ensure that your goggles and gloves are on. Pour the lye into the clay water and stir well. Steam, fumes, and heat are the product of water and lye interacting. Be prepared, and don't breathe in the fumes.
- Place the steaming lye solution someplace safe to cool. I tend to set it in cold water in the sink. Cool to 90°F (32°C).


Melt the Coconut Oil
- Melt the coconut oil on low heat on your stove. When just a few pieces of solid oil are floating in the pan, turn off the heat and move the pan to a potholder. Stir with your spatula until it's fully melted.

Add the Liquid Oils
- Next, add the liquid oils to the pan of melted oils. Use the spatula to get as much of the oils in as possible since castor oil has a tendency to stick. Mix well and take the oil's temperature. You're aiming to bring it down to about 90°F (32°C).

Bring the Soap Ingredients to Emulsion
- When the temperature of the lye solution and pan of oils are both around 90°F (32°C), you can mix them together. Gently pour the lye solution into the pan of warm oils.
- Gently stir with a spatula for a minute or two, as the mixture might thicken up quickly without the aid of an immersion blender. Soap recipes high in coconut oil can often set up quickly. If the soap batter doesn't thicken after stirring for a couple of minutes, carefully use an immersion blender to bring it to an emulsion.
- While using the immersion blender, ensure that the head of the blender is always under the surface of the soap batter ingredients. Use short pulses, followed by stirring with the blender turned off. It is important not to over-blend since you are aiming for an emulsion or a very light trace.
- At emulsion or a very light trace, stop blending and pour the essential oils in and stir well.
- Next, pour the fine pink Himalayan sea salt into the soap batter. Stir it and keep stirring until the soap thickens to a medium trace. It should happen fairly quickly (within a few minutes). You'll likely notice tiny bubbles escaping the soap batter as you stir. This is normal and is due to air introduced with the salt.


Mold and Decorate the Soap
- When the soap is at medium trace (the consistency of warm custard), you can pour it into the soap mold cavities*. If you pour at a thinner trace, the salt can sink to the bottom of the mold. Use the spatula to scrape every last bit of soap out of the pan and into the mold(s).
- Once the soap batter is molded, you can add a texture to the tops of the bars, if you wish. I used the back of a spoon to make the pattern on mine. Next, sprinkle coarse pink Himalayan salt on top as decoration. This is optional and doesn't serve a huge purpose but presents the soap really well. Once you've sprinkled it on, gently press it into the soap's surface so it's firmly attached.
- Leave the soap to cool and harden in the cavity molds for two days*. After this point, nearly all of the lye will be saponified, and it will be safer to handle the soap.


Unmold and Cure the Soap
- Pop the soap bars out of the cavity molds. They should be firm with a fine texture from the fine Himalayan salt added to the soap batter.
- Now you will need to cure the soap. Curing is a necessary step for all cold process soap recipes, and it's a process that requires at least four weeks of waiting. The soap finishes saponification during the cure time, and excess water evaporates from the bars. Another thing that happens is that the crystalline structure of soap forms. The latter cannot be hurried up and is essential for a good, gentle soap.
- Cure the pink Himalayan soap bars by placing the bars on a layer of grease-proof paper in an out-of-the-way low-humidity place. It should be airy, out of direct sunlight, and away from curious pets and kiddos. Leave them there for a whole month before using the bars.
- Once made, the soap will have a shelf-life of up to two years. The shelf life is dependant on the exact ingredients you used, though — look on all of the backs of the bottles and the closest date is your soap's best-by date.

THANK YOU for your always friendly, good and easy explained recipes. You are one of the reasons I started soap making!
You are so welcome, Jytee! Thank you so much for the lovely message :) ~ Tanya
Hi Tanya,
I made this soap. I poured it in loaf. Missed to cut them after 2 hours. Now it’s hard and crumbly. Any suggestions on rebatching them? I don’t want it to go waste.
I messed up. I didn’t read the last paragraph and hence poured in a loaf and didn’t cut them in 2 hours. Its hard and crumbling when i put force to make it into separate bars. What do I do? Can I do something about it? I loved the color and texture. I don’t wanna waste it and can i somehow melt and pour it and cut it sooner this time? Appreciate your advise. TIA
Hi Anika, what I’d probably do is try to cut the soap into small pieces then stir them into a new batch. If you do this, make sure that you pour the soap into cavity molds.
I will make sure to use cavity molds. But how to stir them into a new batch? Should i double boil it? or should I add little more distilled water and try to melt it in lowest heat? I have never had to rebatch ever. I follow your other recipes and this is the first time I messed by missing the 2 hour cutting window. My bad
No worries at all. You can either just stir the finished soap into the new batch as little chunks or pieces (embed method) or grate it up or do a partial rebatch. The latter involves grating up your soap and mixing it into new soap batter. If you use the same recipe, you’ll hardly know that it was rebatched!
Your directions are so easy to follow! I’ve made this recipe twice. Both times it turned out perfect, the bars are so beautiful! I wish I could include pictures of them. Thank you!
Hi I made this beautiful soap last week thank you for the very clear instructions. It looks and smells beautiful but I’ve noticed last couple of days the soap is getting wet i.e. the surface has condensation on it. please can you advise what would cause this, if I can fix it and how I avoid this next time? The soaps were made as gifts but not sure if the wetness will resolve as it cures and if i can still gift them. Thank you
Hi Saiqa, salt attracts moisture to it naturally, so if the room you’re storing the soap in has humidity, the soap can form beads of moisture. You can dab it off, but it will come back if the environment isn’t changed. I can recommend getting a dehumidifier for the room your soaps are in and keeping the door closed. That’s what I do for my soap room and we don’t even have much humidity here.
Hi Tanya. I love to try using brine or seawater in my soap. And pink salt looks lovely too. I try not to use more than 5% sf in my soaps because it’s humid here. Can I adjust the formulation, or is it necessary to have a high percentage of coconut oil because of the presence of salt? Thank you so much.
That’s right, Christina, the soap recipe is high in coconut oil because of the salt content. When you have coconut oil as high percentages of soap recipes, then it really needs a high superfat. Idea – have you considered getting a dehumidifier for the room you store soap in? I have one similar to [eafl id="90222" name="dehumidifier" text="this one"] running at all times in mine.
Thank you for sharing this lovely recipe. My soap turned out so well. I cannot wait for it to cure.
You’re very welcome, Brenda!
Do you think I can use the Himalayan rhubarb power to color this soap?
Yes, but you’ll need to infuse the oils with rhubarb powder beforehand. The olive oil would be easy, but you could gently heat the coconut oil with rhubarb powder in a slow cooker. I have a Himalayan Rhubarb Soap Recipe that you can check out.
I did a pink Himalayan salt soap four days back with 100% coconut oil, pink clay and jasmine flower infused oil. After 48 hours removed soap from individual molds. Observed beads of water outside the surface of soap. Is this the normal reaction when the soap is curing or something else. Super fat at 20%. Used citric acid. Any suggestions?
Salt attracts water to it – both from the wet soap and from the room it’s stored in. Using a water discount is the first way to reduce the chance of this happening. I have it built into this soap recipe. The other is to store the soap in a place that has low humidity. A dehumidifier can help with that, and I always have one running in my soap room.
Hi Tanya love all your recipes. Can I use lard instead of coconut ? Thank you
Hi Robin and thank you :) Coconut oil is very important for this recipe because it helps give it big fluffy bubbles and lather. Adding so much salt to your soap batter can adversely affect its lathering potential so that’s why the coconut oil is in such a high amount! Lard, on the other hand, does not provide good lather on its own. If you make salt soap using a lard recipe, you’ll probably have almost no lather at all.
So I just produced a version of this myself- had to modify a few things based on my ingredients at hand. I asked salt bar related question on Reddit and was really surprised to have someone say “never use Himalayan salt” and “pink Himalayan salt will cut your skin” and feel awful and so on! I’m no expert but easily found numerous recipes using Himalayan salt …. Have you ever heard such a thing?! I won’t be trying mine for a few weeks but really wondering what an expert (you!) would say to that!
Love your blog! Have tried several things and your great inspiration.
Hello, and thank you :) In texture and cutting potential, Himalayan salt is no different from table salt or sea salt. The fine-grained Himalayan salt in this soap recipe cannot cut you, but it does create an exfoliating bar if you use it directly on the skin. The coarse-grained salt for decoration could probably do some damage if you decided you wanted to hurt yourself. It would take some perseverance and intense dry scrubbing for that to happen, though! As soon as you start wetting and using salt bars, the edges of the coarse salt pieces start wearing away anyway. The person on Reddit sounds like one of those people who tries to find the negative/alarming side to everything. Plenty of those on the internet.
Dear Tanya, your soaps and everything else are lovely! Your recipes and explanations on them are absolutely clear! I feel really grateful to you for making them available to anyone who might like to reproduce them. Tropical regards from Brazil
Thank you for the message, Hélvia, and I’m so pleased to hear your feedback. It’s much appreciated :)